In short. To get a painted model into a game engine, you don’t need to touch UVs:
- Choose Paint, the brush on the left, and paint on the faces.
- Choose Export in the toolbar, keep glTF (.glb), and choose Export, then Share (on a Mac, Share or Save As…).
- Import the .glb into Godot, Unity or Blender.
The export turns your painting into a texture with UVs for you. The rest of this page is for when you want your own image, or a say in the UVs.
Qwartz gives you two ways to put color on a model. Both end up as an ordinary texture with UVs when you export, so a game engine reads the result like any other model. This page walks through each one, then the export.
A word on the iPad: the Apple Pencil uses the tools and your finger moves the camera. Drag with one finger to orbit, pinch to zoom. If you’d rather paint with a finger, turn on Edit with finger in Settings (the ⓘ menu, then Settings…); you then navigate with two fingers. On a Mac, everything below is a click or a drag with the mouse.
Two ways to texture
Pixel paint is the quick one. Pick the Paint tool and paint straight on the faces. Each face gets its own pixel grid, sized to the face, so a pixel is the same size everywhere on the model. There are no UVs to think about. Use it for pixel-art props, characters and blocks you paint by hand.
Your own texture is for when the image comes first: a texture you drew in another app, a tile from a pack, a photo. You give the faces a Texture material, load your PNG or JPEG, and lay the faces out on the image with UVs. Use it when the art already exists, or when several faces must share one image.
You can mix them on the same model, face by face.
Pixel paint
- Pick the Paint tool, the brush in the tool strip on the left (or press P on a Mac). The paint palette opens on the right.
- Pick a color, and a tool: pencil, eraser, fill, line, rectangle, circle or eyedropper.
- Paint on any face. With the Pencil on iPad, with the mouse on a Mac.
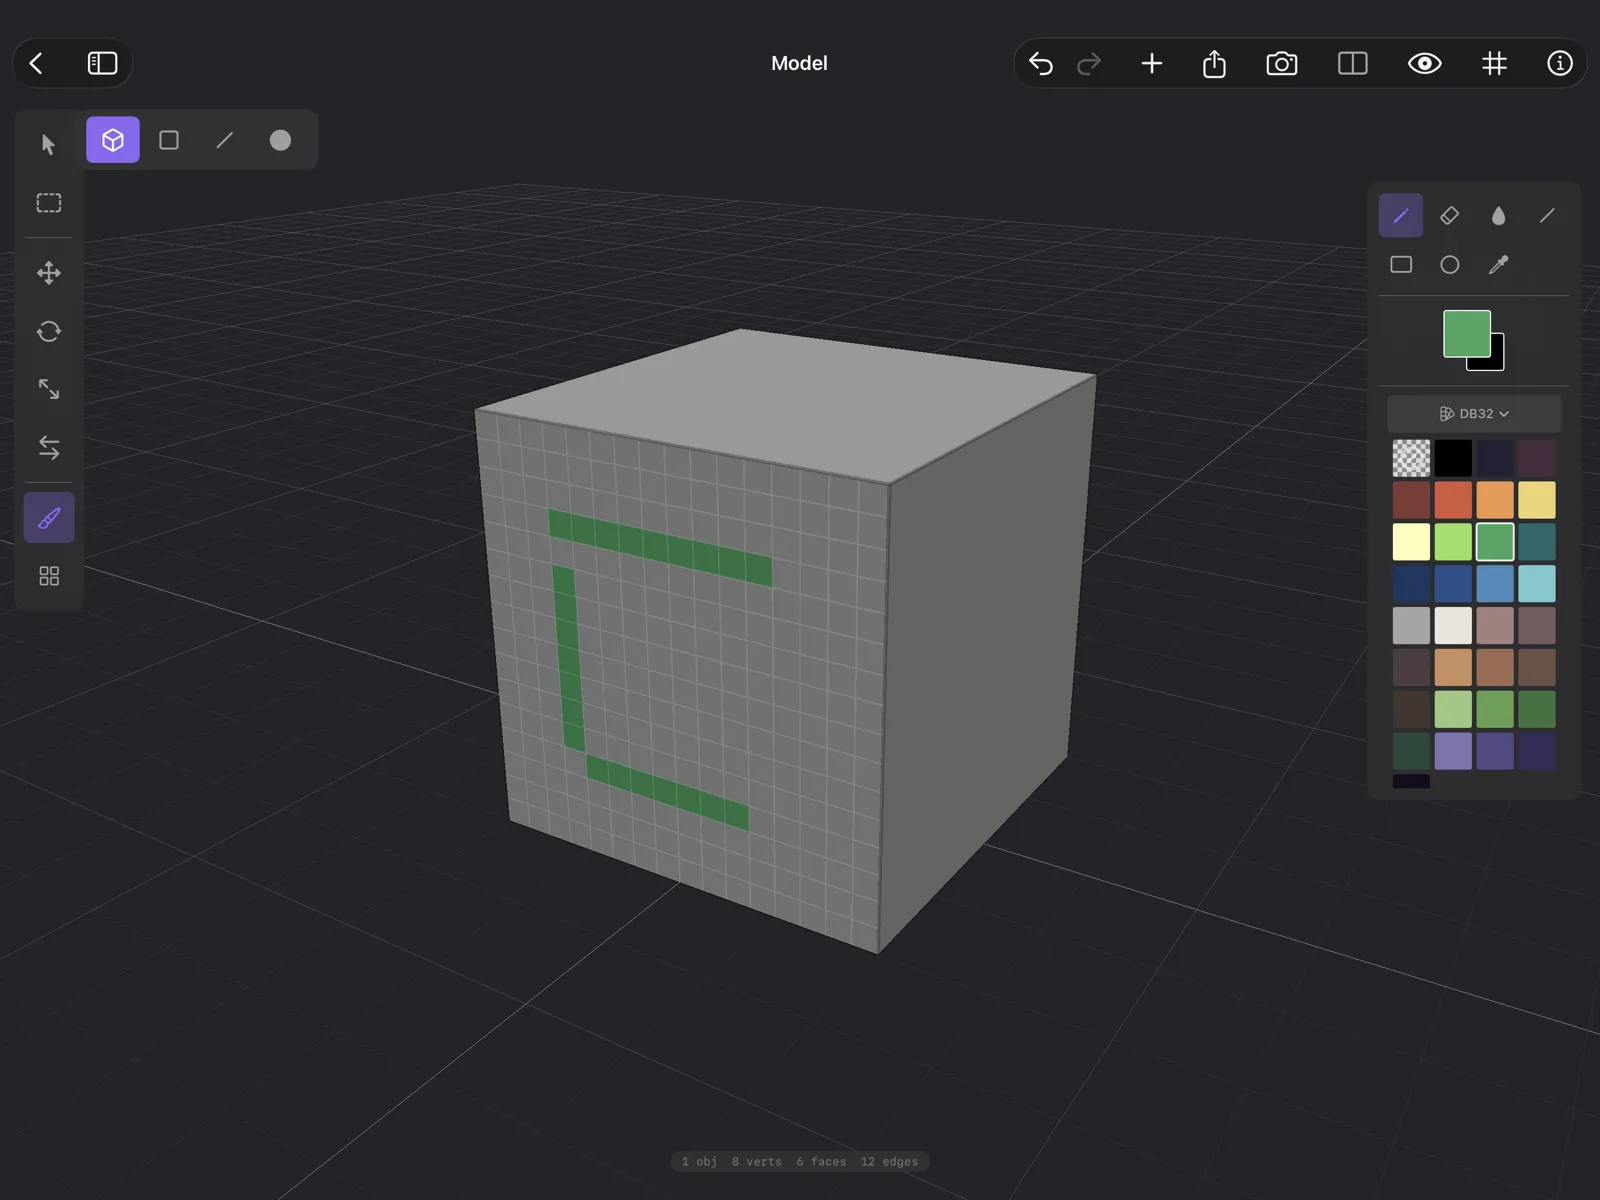
On a Mac, X swaps the two colors and Option-click picks a color from the model. The grid shows only while you paint. Faces get 16 pixels per unit unless you change Pixel density in Settings (on a Mac, Qwartz → Settings…); it applies the first time you paint an object.
A stroke can cross from painted faces onto faces that use a Texture material, below: each face takes the paint its own way, and one undo takes back the whole stroke.
The first stroke on an object creates a material named after it, such as Cube Pixels, and you’ll see it in the Materials panel. If the face had a Color material, its color becomes the background you paint over. Moving vertices later resizes the face’s pixels with it.
What happens on export. Pixel paint lives on the faces, which no other app understands, so the export bakes it: all the painted faces of an object are packed into one PNG, and each face gets the UVs that point at its pixels. Transparent pixels stay transparent. You don’t have to do anything for this; it happens every time you export.
Bake to Texture
If you want that baked image inside Qwartz, to rearrange it in the UV editor or keep editing it as one picture, bake it yourself:
- Turn Paint off (choose the arrow at the top of the tool strip) and select the object.
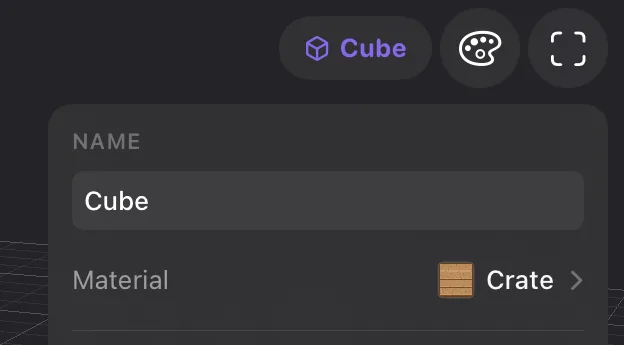
- In the Inspector on the right, choose the Material row; it reads Cube Pixels. The Materials panel opens on that material.
- Choose Bake to Texture.
The material becomes a Texture material holding the packed image, and each face gets its UVs. From then on, painting on those faces paints into the image. Undo takes you back if you change your mind.
Your own texture
- Choose what gets the texture. In Object mode, select the object: every face gets it. In Face mode (the square, top left), select the faces you want.
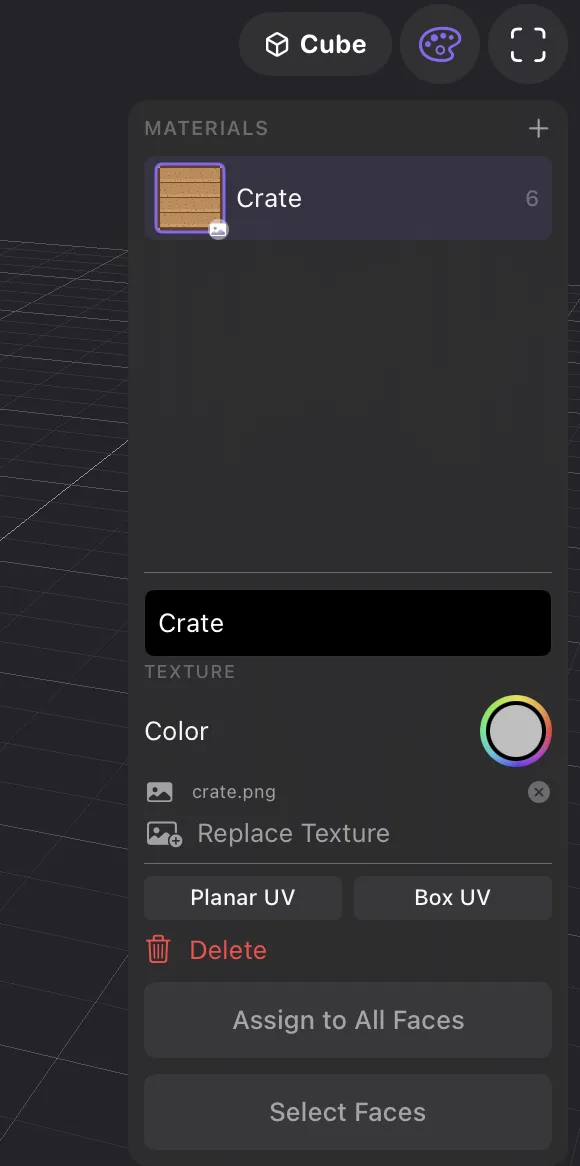
- Open the Materials panel: choose the Material row in the Inspector on the right, or the palette button next to the selection name. The panel shows in Object and Face mode, while neither Paint nor Tile is on.
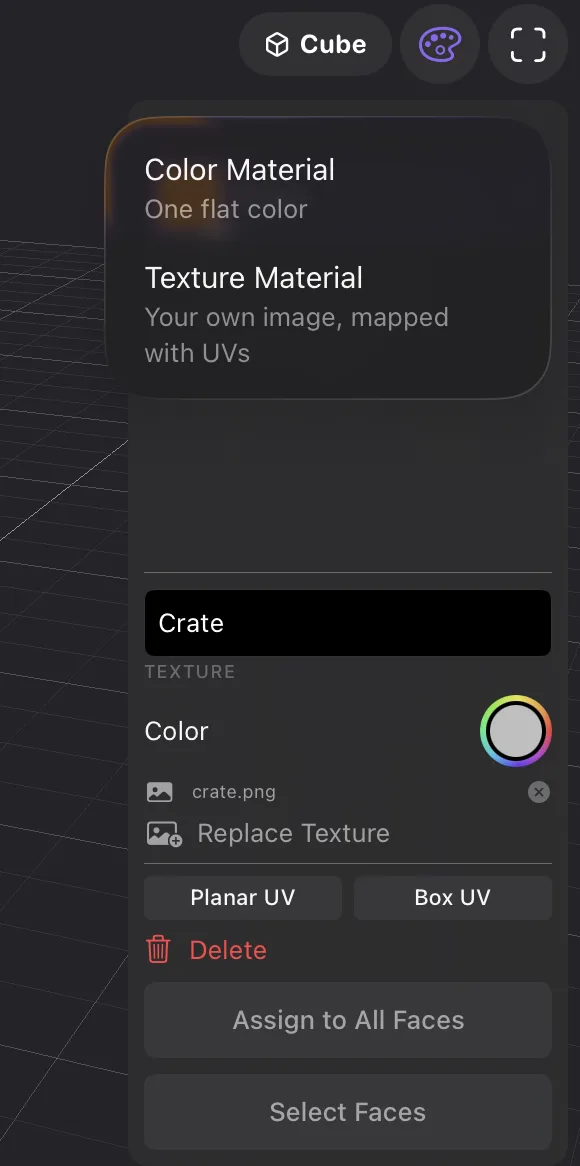
- Choose + at the top of the panel, then Texture Material. It’s assigned to your selection right away, with a blank 64 × 64 image.
- Choose Replace Texture and pick your PNG or JPEG. The image is saved inside the
.qwartzfile, and the UV editor opens beside the model. If the panel goes back to the Inspector when it does, choose the Material row again. - Give the faces UVs with Planar UV or Box UV, below.
A blank texture is fully transparent, so the faces look see-through until you load an image or paint on them. That’s expected.
To put a material you already made on more faces, select them, pick the material in the list, and choose Assign to Selected (Face mode) or Assign to All Faces. If any of those faces has no UVs yet, assigning a textured material gives all of them Box UVs.
With the Paint tool, strokes on faces that use a Texture material go into the image itself, through the UVs. The texture changes everywhere it’s used.
Planar and Box UV
UVs say which part of the image lands on each face. Until a face has UVs, it shows the whole image stretched across it. The two buttons appear in the Materials panel once the material has an image, and they work on the selected faces (Face mode) or the whole object (Object mode).
- Planar UV looks at the faces from one direction, their average facing, and lays them flat on the image as one piece. Use it for a wall, a floor, a sign: faces that face the same way.
- Box UV looks at each face from the nearest of the six sides of a box. Faces that face the same way share the same part of the image. Use it for blocky shapes: crates, buildings, rocks.
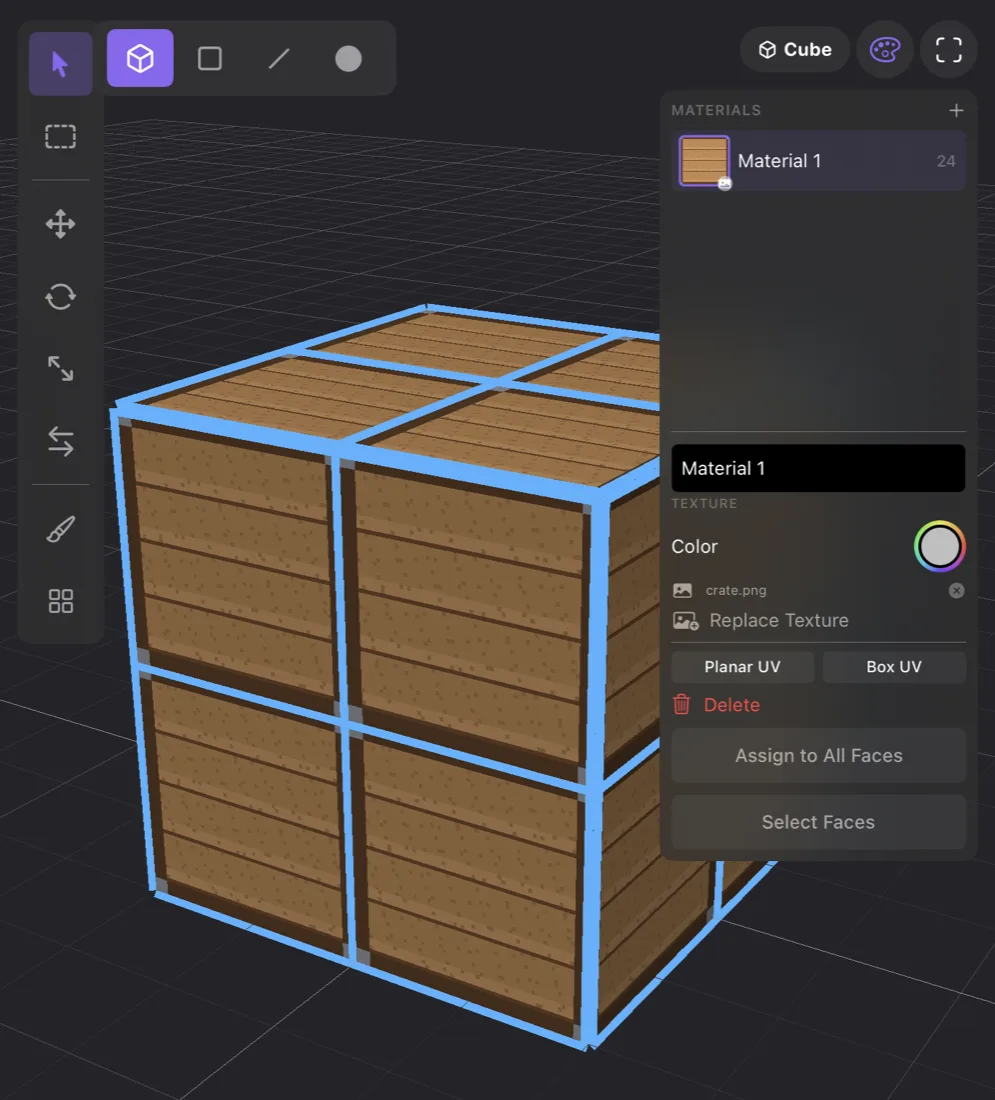
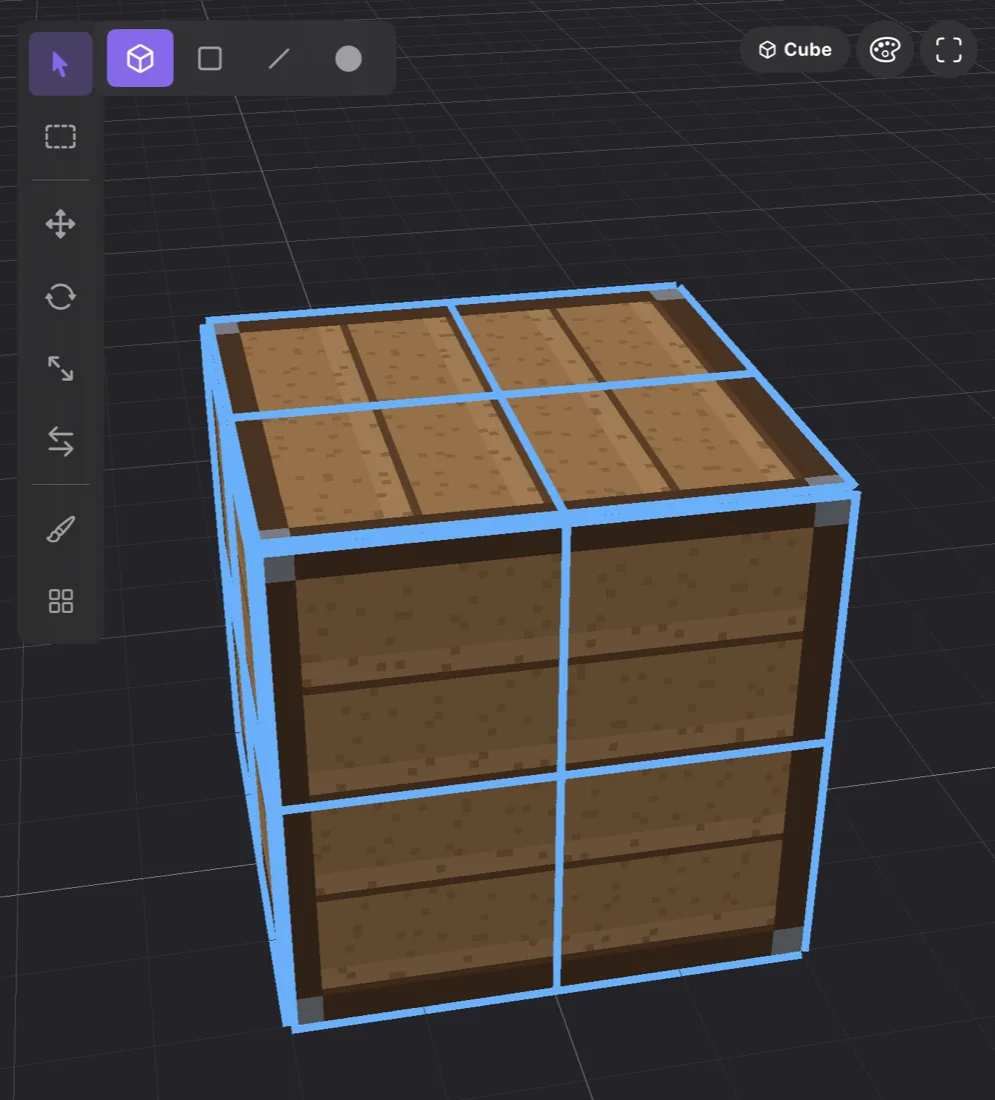
Either one is a starting point. Fine-tune in the UV editor.
The UV editor
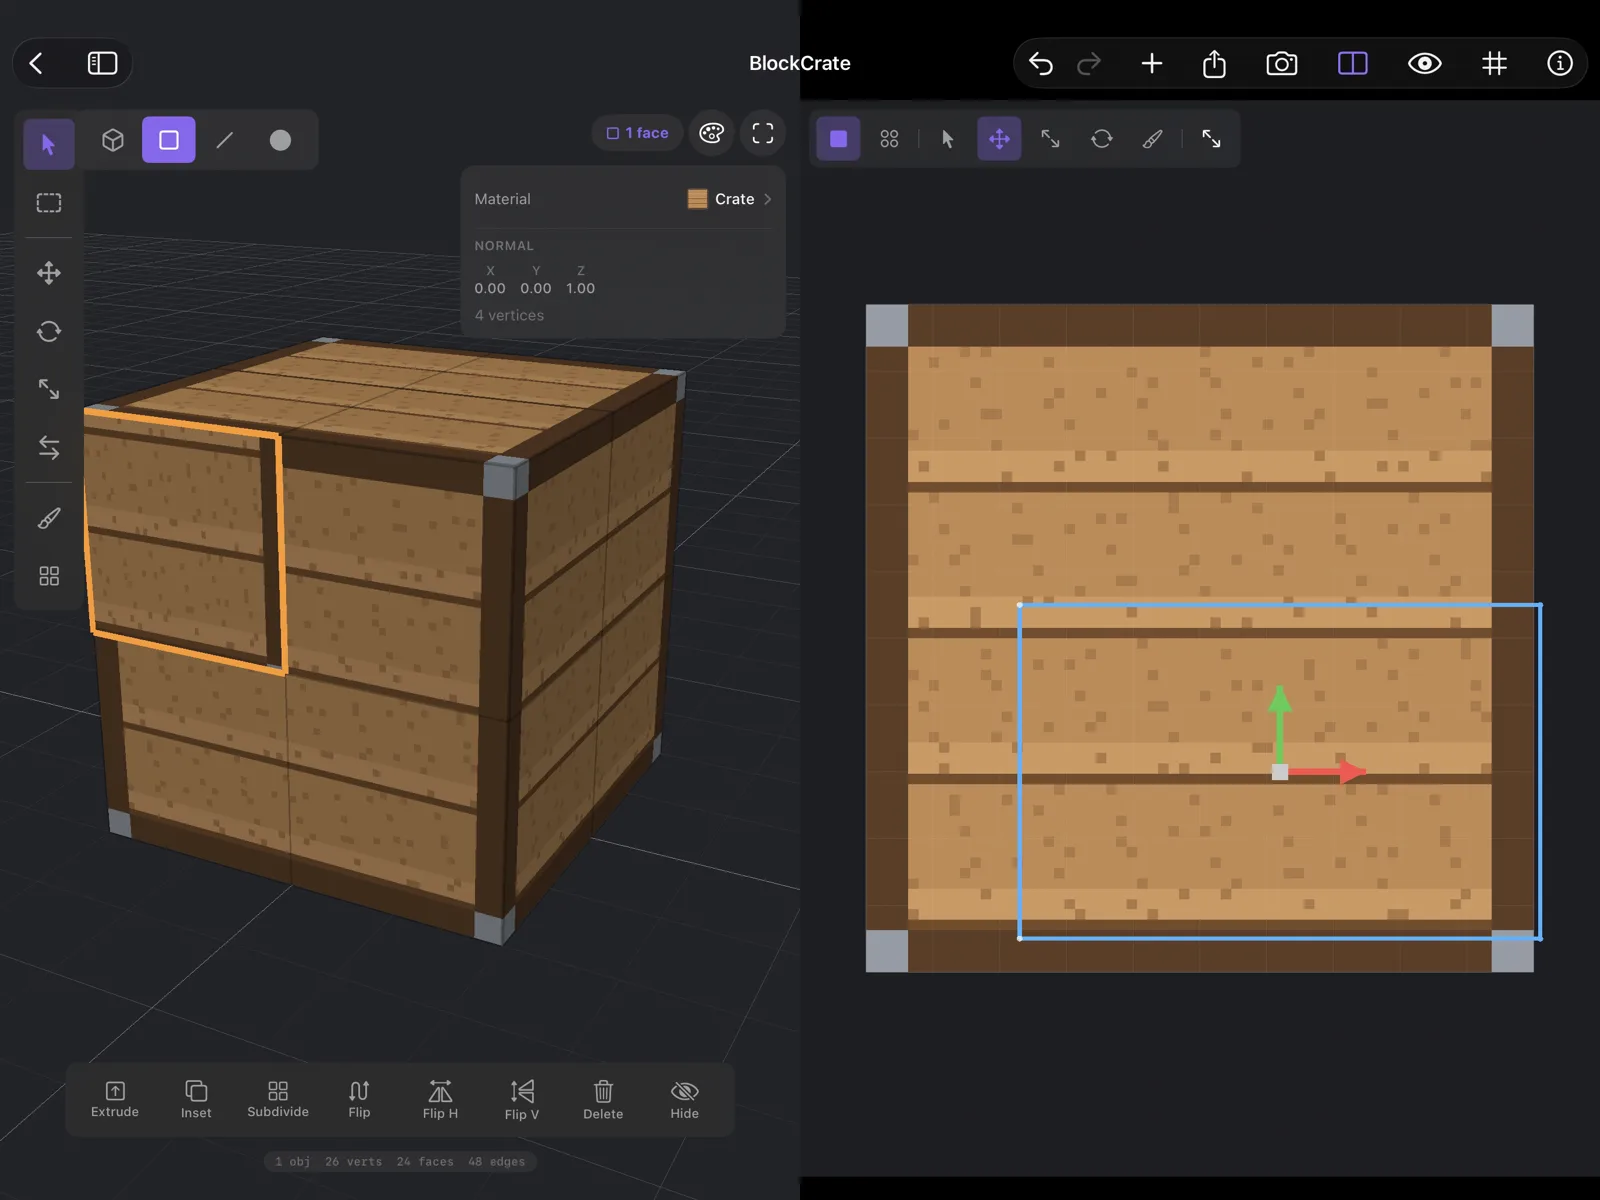
Open it with the UV Editor button in the toolbar (the split rectangle). It shows the texture, with the UVs of the faces you selected in the 3D view on top of it. Select faces in Face mode to see them; to see every face of the object, open View Settings (the eye) and set Show to All.
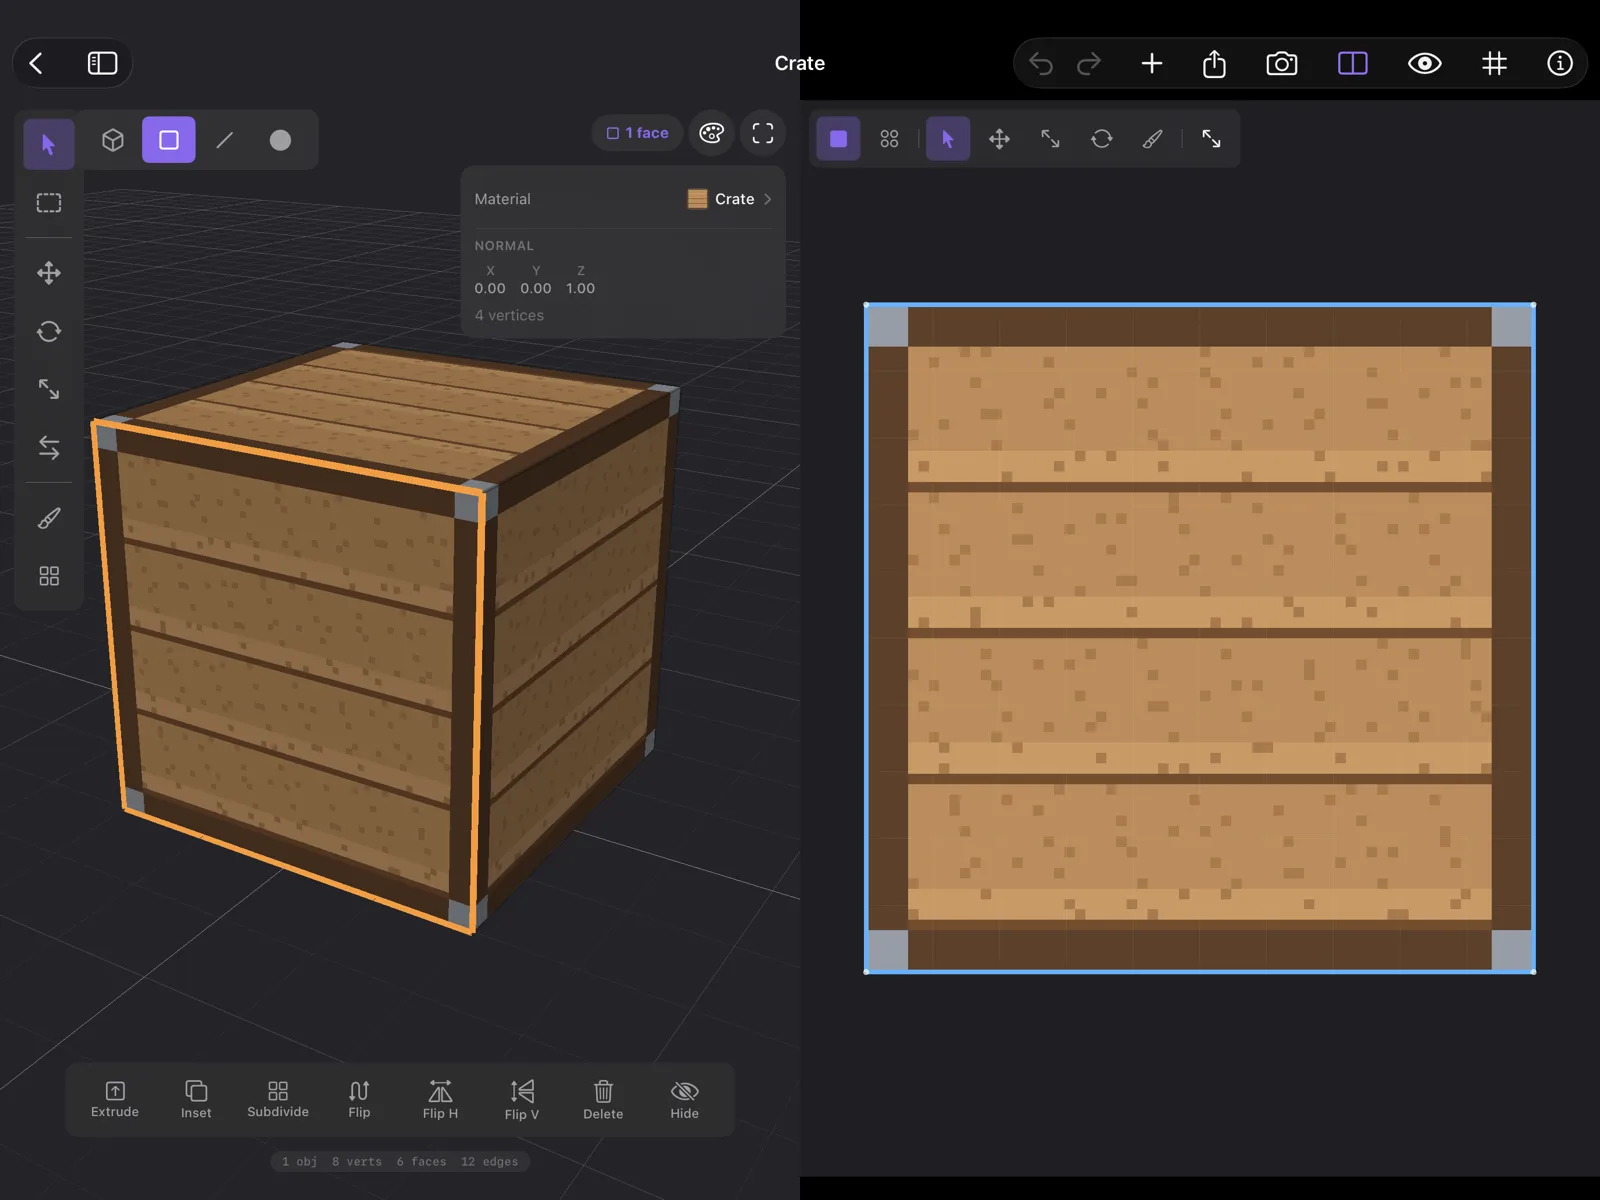
The tools sit along the top of the editor:
- Face and Vertex decide what you pick: whole faces, or single corners.
- Select picks; tap or click a face or corner, or drag a box around several.
- Move, Scale and Rotate show handles; drag them to fit the faces to the part of the image you want.
- Paint paints into the texture, with the same palette and tools as in 3D. The model updates as you paint.
- Fit UV Space brings the whole image back into view.
On iPad, pinch to zoom and drag with two fingers to pan. On a Mac, scroll to pan, and pinch on the trackpad or hold Command and scroll to zoom. The Mac shortcuts are W Select, G Move, S Scale, R Rotate, B Paint.
Move the UVs
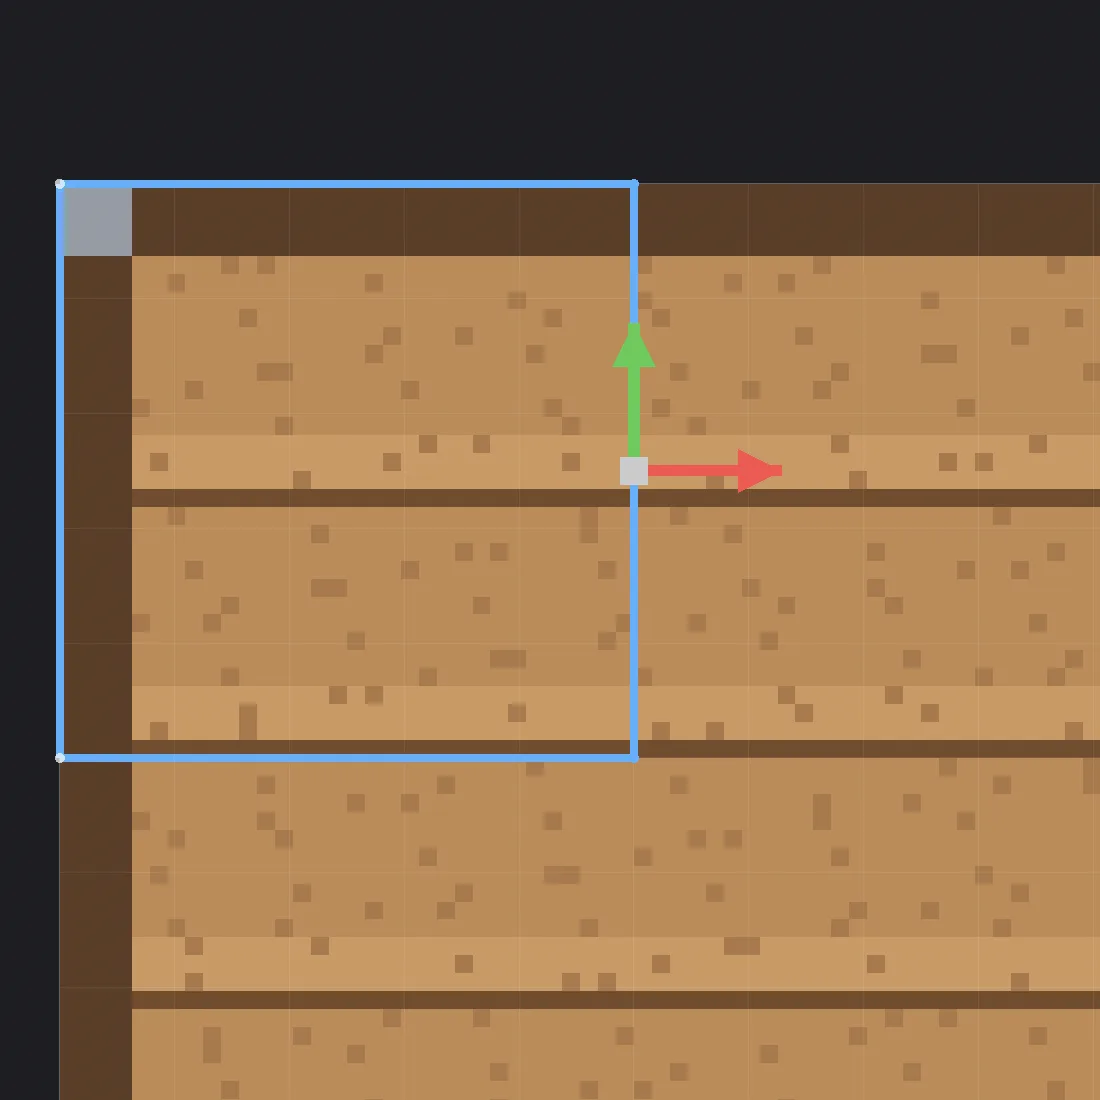
The outline in the UV editor is made of points you can move. Where you put them decides which part of the image the face shows.
- In Face mode, select the faces in the 3D view, and open the UV editor.
- At the left of the editor’s toolbar, choose what you pick: Vertex (the four dots) for single corners, or Face (the square) for whole faces.
- Tap a corner or a face to select it. To take several, drag a box around them, starting from an empty spot.
- Choose Move (the four arrows) and drag its handle: the square in the middle moves freely, the red arrow only sideways, the green arrow only up and down. The face on the model shows its new part of the image as you drag.
The Move handle sits in the middle of what you selected, which is the easiest way to see your selection: the selected corners themselves are small. You can also drag a selected corner or face directly, without Move, and Scale and Rotate work on the same selection. Undo puts the UVs back.
On iPad, the Pencil and one finger both pick and drag in the UV editor; two fingers pan, and a pinch zooms. A new tap or box replaces the selection. On a Mac, click to pick and drag a box; Shift-click adds or removes a corner or a face, and Shift-dragging a box adds to the selection. With the pointer in the editor, G chooses Move and W Select.
Export
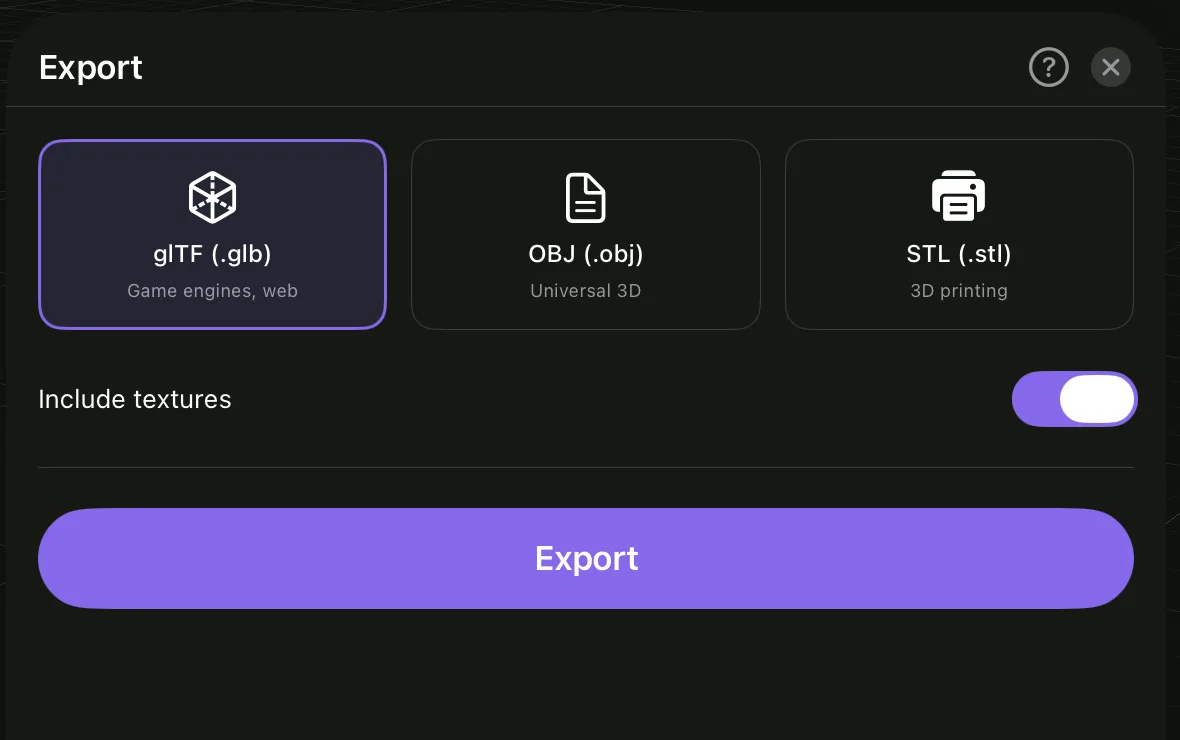
- Choose Export in the toolbar (the square with an arrow pointing up).
- Choose a format, below.
- If something is selected, choose Entire Scene or Selected Objects.
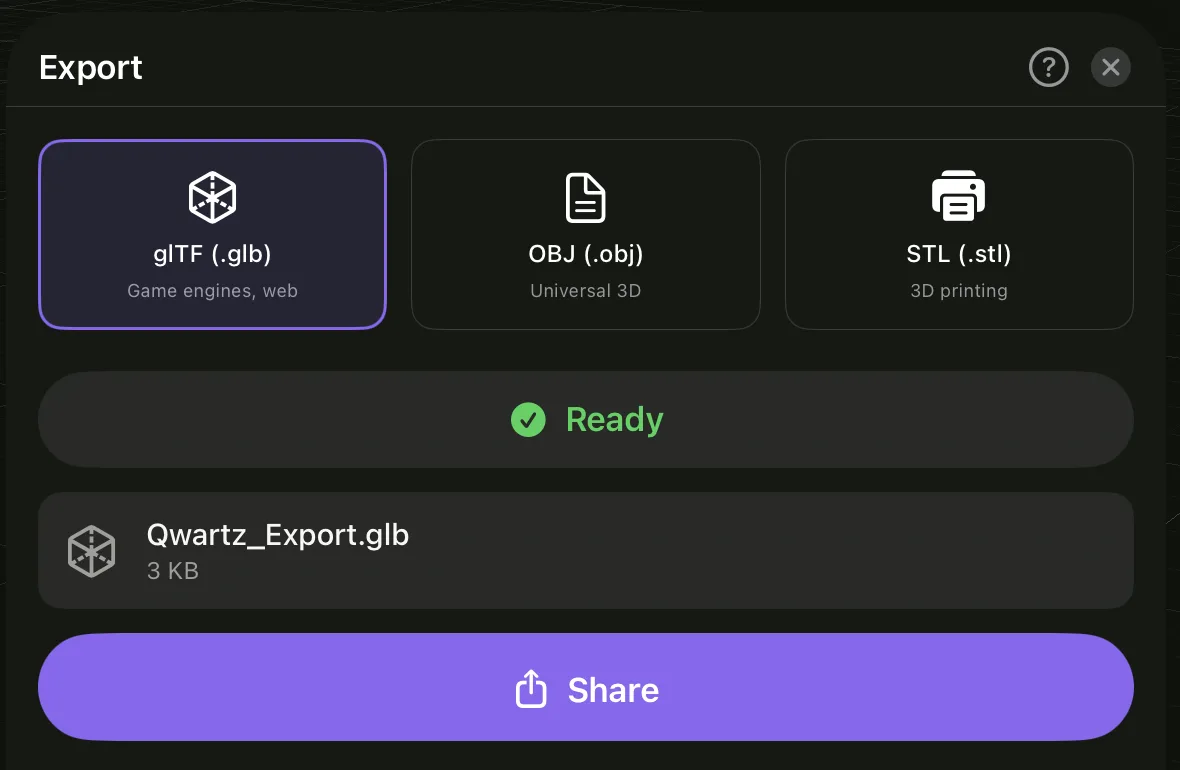
- Choose Export. When it says Ready, Share it: save it to Files, AirDrop it, or send it to another app. On a Mac you also have Save As…; saving over a file that’s already there replaces it.
Hidden objects are left out. The ? at the top of the sheet opens this page.
| Format | Carries | Use it for |
|---|---|---|
| glTF (.glb) | Geometry, UVs, materials and every texture, all in one file | Game engines, Blender, the web. The one to pick for a textured model. |
| OBJ (.obj) | Geometry, UVs, normals, materials and textures | Tools that don’t read glTF |
| STL (.stl) | Geometry only, no color | 3D printing |
For .glb, leave Include textures on. Pixel paint is baked into each object’s texture as described above, and both your own textures and the baked ones are embedded in the file, set to nearest-neighbour filtering so pixels stay sharp. Colors come out as you see them in Qwartz, Color materials included, and transparent pixels stay see-through.
Turn Include textures off for a model with no images at all: each face that would show one gets a single flat color instead, the average of what it shows, so the model still looks like itself.
About .obj: an OBJ model is several files. Share sends one .zip holding a folder with the .obj, its .mtl material file and every texture image; on a Mac, Save As… saves that folder directly. Keep the files together when you move them. File names have no spaces, so other apps find the textures.
Into your engine
Import the .glb. If the pixels look soft or blurry, the engine is smoothing the texture: switch its filtering to nearest (point) for that texture or material.
Godot
Copy the .glb into your project folder, or drag it into the FileSystem dock. Godot imports it as a scene: drag it into your level, or double-click it for the import settings. If a texture looks soft, set the material’s Sampling → Filter to Nearest.
Unity
Unity doesn’t open .glb files on its own. Add Unity’s glTFast package once: Window → Package Manager, +, Add package by name…, and enter com.unity.cloud.gltfast. Then drag the .glb into your Assets folder and use it like any model. If a texture looks soft, select it and set Filter Mode to Point (no filter).
Blender
File → Import → glTF 2.0 (.glb/.gltf). Switch the viewport to Material Preview to see the textures. If they look soft, open the Shading workspace and set the Image Texture node’s interpolation to Closest.
The free version
Everything in this page works in the free version: painting, materials, UVs, the UV editor. Exporting is what the one-time purchase unlocks. Until then, the Export sheet shows Unlock to Export. The free version also lets you make up to five models, and puts a watermark on renders.
This page opens from the app too: Help in the ⓘ menu on iPad, Help → Qwartz Help (⌘?) on a Mac, and the ? on the Export sheet. Stuck somewhere it doesn’t cover? Write to mail@qwartz.app and tell us what you’re making.